Don't miss our holiday offer - up to 50% OFF!
A Guide to Screen Printing T-Shirts

Each printer has their own unique story of why they got into screen printing. Some wanted to start their own clothing line. Others found it as a way to make a living. No matter what boat you’re in, screen printing is a large process to learn. Check out this easy guide to learn the proper steps for screen printing t-shirts.

PREPARING ARTWORK
To print a shirt, you of course have to have something to print on the shirt. Whether you design the artwork yourself or a customer brings it to you, all screen printing starts with some type of artwork. When thinking about the artwork you want on your t-shirts, remember that garbage in equals garbage out. In essence, the better the quality of artwork you start with, the better quality of a screen print you end up with. When screen printing t-shirts, you print one color at a time. If you are printing multiple colors, you will need a way to separate the colors from each other so you can create different screens for your design. You need one color per screen.
A lot of screen printers use Illustrator, Photoshop, or Procreate to take care of their artwork needs. These programs separate and clean up the artwork to help you prepare for printing.
Never used Illustrator before? Check out this free course on designing in Adobe® Illustrator. It walks you through everything you’ll need to know about the program, from setting up your page to vectorizing designs. The free course also includes an art pack, so you can follow along and master Adobe® Illustrator.
Sometimes, you just need a little help with making your design. Check out ScreenPrinting.com’s screen printing art. From brushes, texture packs, fonts, and skull packs, you can find the art you need to complete your next design.
RELATED: WHY PRINTERS NEED TO MASTER ADOBE® ILLUSTRATOR FOR SCREEN PRINTING

Once the artwork is created and the colors are separated, the next step is to print a film positive. A film positive transparency is basically like an overhead transparency. You will use this film positive to burn the image into a silk screen. Whatever you want to print on the t-shirt, you print it out in black ink on the film positive.
There are many ways to make film positives. You can pay a local print shop to print the film, hand draw your image on the film, or purchase a compatible printer that you can use at home or in your shop.
RELATED: HOW TO GET A DARKER FILM TRANSPARENCY
EXPOSING THE IMAGE ONTO A SCREEN
Once you have printed the films, it is time to make the screen. A screen printing frame consists of a wood or aluminum frame stretched with polyester mesh on it. The mesh holds the image onto the screen and lets ink pass through when you press it with a squeegee. You will need to coat the mesh with emulsion in order to expose the design onto the screen. Before you coat the mesh, it needs to be cleaned with a special screen printing degreaser to ensure any dust, lint, or particles is washed off so no bumps or pinholes appear in your emulsion.
RELATED: WHICH BASELAYR EMULSION IS RIGHT FOR ME?
Emulsion is light sensitive, so coating the screen is typically done in a darkroom that has special light-safe yellow bulbs in it. After the screen is coated and dried, align the film positive onto the screen and expose it with a screen printing exposure unit or an exposure lightbulb for an allotted amount of time. The screen hardens to light, but the film positive or black area of the film blocks light from reaching the emulsion. This leaves the area of emulsion unexposed or soft. After the screen is exposed, simply rinse it with water. The soft part of the emulsion that was not exposed rinses out, leaving areas of the mesh open that reflects your design.
RELATED: HOW TO DIAL IN EXPOSURE TIMES
New to the darkroom? Check out this free course on the basics of screen printing. It’ll show you how to dial in the darkroom, expose screens, and get the best screen possible.
For printers looking to ramp up exposure tactics, there’s a course for that too! How to Screen Print with a Kit: 250 Edition teaches screen printers the ins and outs of coating screens and drying them properly for the best printing potential.

Photo by Press or Dye.
\
SETTING UP THE SCREEN PRINTING PRESS
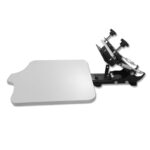
Before you are ready to start screen printing t-shirts, you need to step up the screens on your screen printing press. A screen printing press consists of a base that holds printing platens and a number of color arms. A manual press can be as small as a 1 color 1 station, or as large as an 8 color 6 station. Of course, if you have more color arms, you have the ability to print more colors at one time. Likewise, if you have a higher amount of printing stations, you can print more at a faster pace.
A great beginner press is the Riley Hopkins 150 Press. Simple yet versatile, the 150 press lets you learn the craft of screen printing. Practice printing on shirts, sleeves, tags, chests, and more. When you begin to grow, the 150 is perfect for live printing or for one-color jobs or tag and sleeve prints.
RELATED: HOW TO REGISTER A MULTICOLOR PRINT ON THE 150 PRESS
Check out these free courses to learn how to set up screen printing equipment. With 150 and 250 kit course options, you’ll learn how to assemble the press and set up all the equipment in your shop for the best flow.

Photo by Symmetree Clothing.
PRINTING YOUR SHIRTS
Before loading the shirt onto the platen, you will want to make sure to apply pallet adhesive to the platen. This helps the shirt stick to the platen and not move around. Load your shirt onto the press and get your printhead aligned. Before locking the print head into place above your shirt, make sure to flood the screen with ink.
Once the print head is locked down, push or pull the screen printing ink across the screen to deposit the ink onto the shirt. You may need more than one round of this depending on how much ink was deposited. If you are printing multiple colors, follow these steps with your other screens. To learn the basics of printing t-shirts, check out this free course.
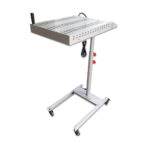
Keep in mind that you may need to flash your shirt in between prints. This is especially true if you are printing on dark garments with a white under base. The flash dryer helps to cure/set the ink. This gives you the ability to print another color on top of your first layer. Wanting to pick up some other printing techniques? Learn some new tips and tricks in this free course.
You also need to cure the print after you are completely done printing it. Curing is when the ink dries and sets in the garment. You can cure a shirt with a conveyor dryer or a flash dryer. The temperature at which the ink cure varies. Read the instructions on the ink container to learn the proper cure temperature. If a shirt isn’t cured properly, the ink will not last and the print will start to degrade. To test whether a print has been properly cured, perform the stretch test and a wash test. Also use a laser temp gun or a donut probe to view the ink’s temperature.
RELATED: HOW TO PROPERLY CURE PLASTISOL INK WITH A FLASH DRYER
Photo by Black Print Ink USA.
Photo by Black Print Ink USA.
That’s just scratching the surface. We could dive deep into the purposes of each mesh count, which emulsion to use, troubleshooting emulsion application issues, differences in squeegee durometer, which manual press is best for you, uses of plastisol and water-based inks, curing tips and tricks, shop setup, and so much more. Screen printing is a complex art form. It’s frustrating yet engaging. The beauty of screen printing means you’ll always be learning as you continue to grow.
For a complete course on how to screen print, check out How to Screen Print With a Kit: 150 Edition Online Course. It’s a comprehensive, FREE course that’ll walk you through everything from darkroom setup to reclaim. For a more in-depth look at the screen printing process — from darkroom setup to cataloging prints and reclaiming with a dunk tank— check out How to Screen Print with a Kit: 250 Edition.
We’d love to help you every step of the way. If you’re more of a visual learner, head to our YouTube channel and watch the how to screen print video series. If you have any questions, check out the FAQ or chat with us online and we’ll answer your questions as best as we can.
Tags: Automatic screen printing machine, Eco friendly, How to, How to guides, How to print t shirts, How to: tips/lists, How to: videos, Ink, Manual press, Manual screen printing, Printing, Printing with plastisol ink, Printing with water based ink, Products and education, Riley hopkins, Riley hopkins press, Roq automatic screen printing, Ryonet, Screen printing, Screen printing how to, Screen printing info, Screen printing ink, Screen printing press, Tips, Tips and tricks, Youtube

